Ladybug Mosaic Garden Decoration
Relaxing and enjoying in my backyard is one of my favorite leisure time during the spring and summer, so I am always on the look out for creative ideas to decorate my garden. You don’t have to spend extra money on some fancy garden decors. With a bit of creativity and time, you can create some cute garden decors by yourself.
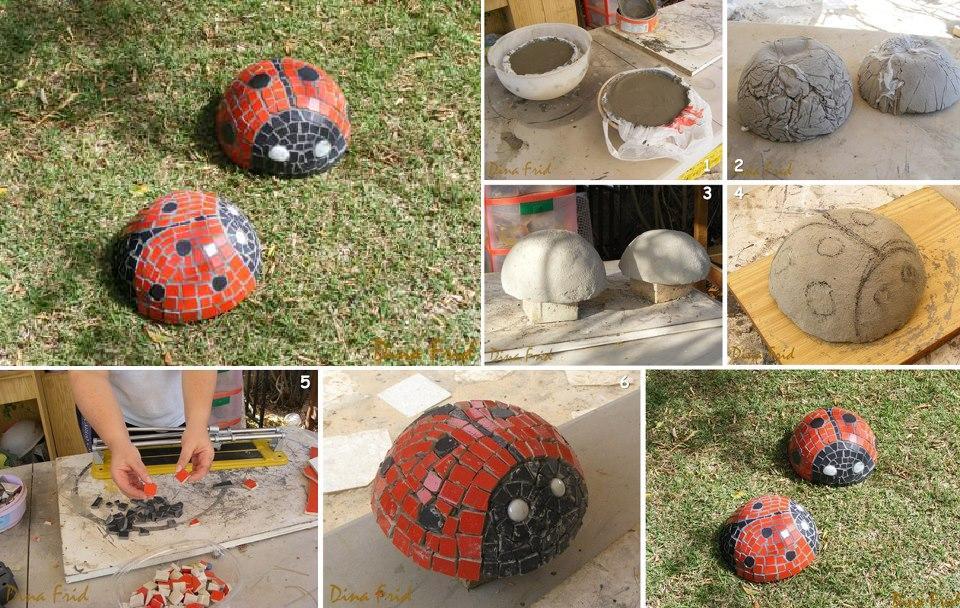
Here is a nice DIY project to make ladybug mosaic garden stones. They are lovely decoration to brighten up your garden! I really like their bright colors, which add a colorful and fun touch to your garden. Let’s get started!
Here are the supplies you may need:
- Cement;
- Water;
- Round container;
- Plastic bag;
- Chalk;
- Black and red tiles;
- White glass beads;
- Glue.
Instructions:
- Take a round container with the shape of the base resembles that of a ladybug.
- Wrap the inside of the container with a plastic bag.
- Pour the cement in the container and mix with water according to the instructions on the bag of cement.
- When the mold is dry, use a chalk to draw the patterns of a ladybug on it.
- Glue the tiles on the mode according to the patterns.
- Glue the white glass beads as the eyes. Enjoy!
The followings are other creative ideas to make ladybug garden decors. They are fun crafts to work with kids. Enjoy!
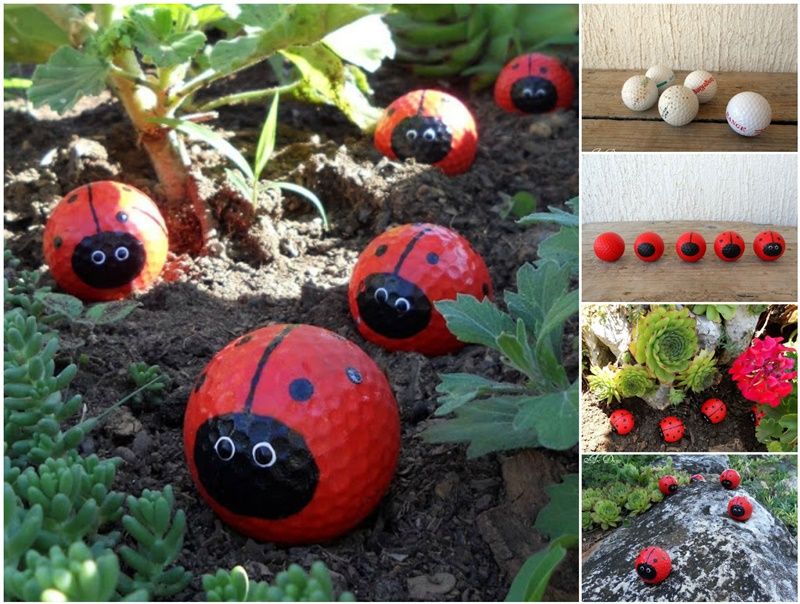
Click here for DIY Cute Golf Ball Ladybugs
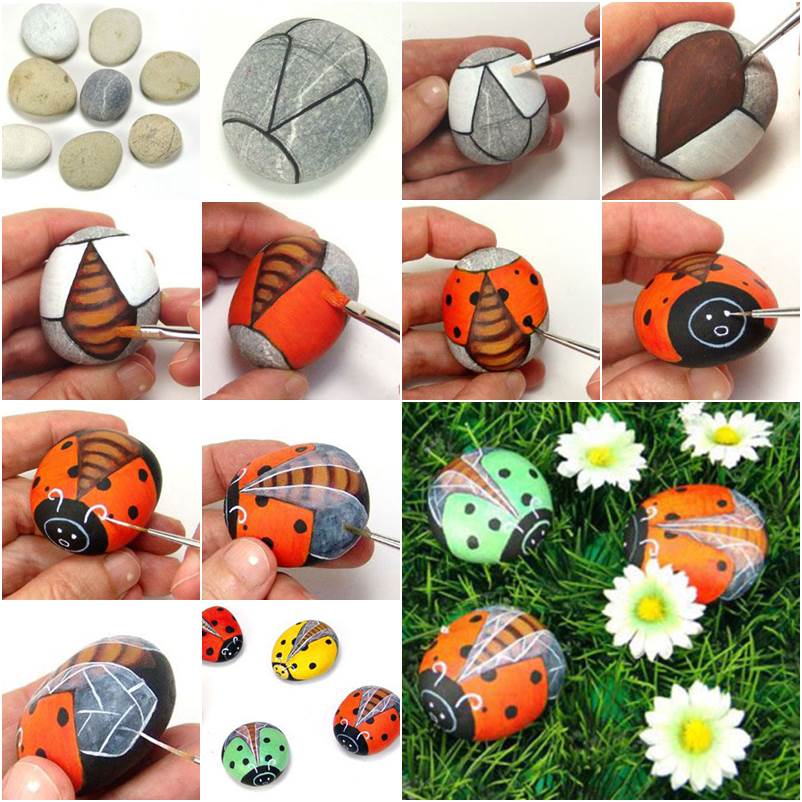
Click here for DIY Painted Pebble Ladybugs
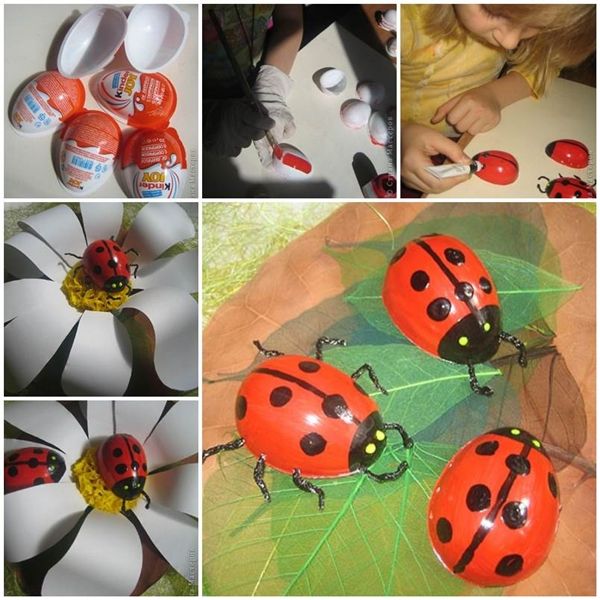
Click here for How to Make Painted Ladybug from Easter Egg